Don’t you just love this time of year, when all the hard work that you have put into your garden is starting to pay off? I know that I do and I try to take as much advantage as I can of all the beautiful produce out in the backyard. It has been a really productive growing season mostly because of the long sunny summer and early spring. We’ve never had better results from our carrots and beets, they are HUGE. One of each and a piece of steak or chicken is enough for a meal for the two of us. The yellow beans came thick and fast and are just now getting too old. And the tomatoes, oh, the tomatoes! We’ve had cherry tomatoes but the tub full and the lucky people at work have been enjoying the extras again this year. I’m also more than happy with the beefsteaks. Some of them have grown huge, almost the size of grapefruits and they are actually ripening on the vine. That’s a bit unusual for us; the bigger tomatoes usually just stay green or rot before ripening. Last year we actually had to buy some red ones from the grocery store to make Hot Dog Relish.
Last weekend we decided that it was time to make a batch of my Grandmother Vera’s Dutch Salad pickles. These have been a long time favourite in my family and ever since she became unable to make them I have been doing them for myself from the recipe she wrote out for me. I still have the note she gave me and it is part of the fun of doing them to look at it and remember watching her make them for the first time.

Mustard pickles, because that’s a much more descriptive name for them than Dutch Salad, are pretty easy to make but they are time-consuming. The chopping and the brining take at least a couple of hours the first day and then the draining and boiling and bottling take another couple of hours the second day.

The tedious part is the constant stirring once we start bringing the pot up to a boil. It can take a long time to get there and then it has to be held there for 20 minutes. You really don’t want them to stick and burn on the bottom of the pot though so continuous stirring is required.


This year’s batch made 8 500ml and 9 250ml jars which is more than enough for me, Hubby has never cared for them for some reason. Mustard pickles go with just about any kind of meal so I eat them regularly but still with that many jars there might even be enough to share.
After I finished making the Mustard pickles I still had time and the inclination to do something else so I decided that I would make a batch of Chow Chow. This is something else that Granny used to make but unfortunately I never got a copy of that recipe and I’ve been trying to duplicate it for the past few years. I’ve tried a bunch of other people’s recipes but they haven’t been quite right. Last year though I found one that was pretty close. It was too salty and not spicy enough but that’s easily fixed.

Chow Chow is pretty simple, mainly just tomatoes, onions, vinegar, salt and a spice bag which gets removed before the relish is bottled. Both this recipe and the Mustard pickles use green tomatoes which we have a ton of this year. We also have lots of onions. It is so much more satisfying to preserve your harvest if you don’t need to go to the grocery store to buy any extras.

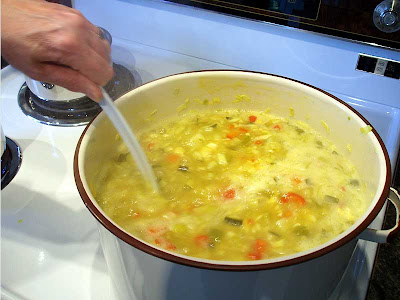
The vegetables have all been chopped and are soaking in the brine. It’s a beautiful colour at this point don’t you think? Looks almost good enough to eat… This year we only got 4 250ml and 1 500ml jars plus a part jar for the fridge. I usually only eat this with fish so that’s more than enough.

Well, that was last weekend. This week we decided to make our grape jelly mainly because the birds and the remnants of Hurricane Earl were clearing the vines already. We still managed to harvest almost twice as many grapes as last year even though we left some unripened ones on the vine. The birds can have those.

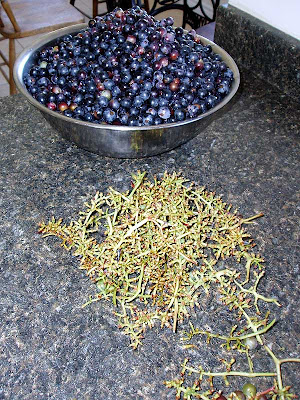
This variety of grape, which we think is Bath, never sweetens up enough to eat. They’re just too tart to enjoy but it makes great jelly. They look really nice, too. We took in some that were still a little green but that didn’t seem to make any difference to the process.

The first step was washing the grapes in a sink full of water to remove any dirt and bugs. Spiders, too, yuck! Then the tiresome job of removing the fruit from the stems began. With the two of working at this it still took over an hour to finish but we ended up with a big pot full of fruit.


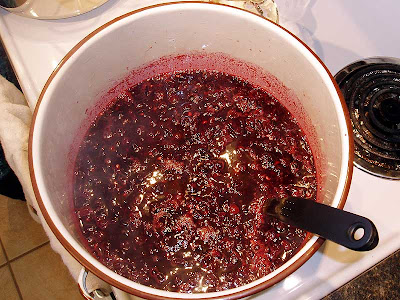
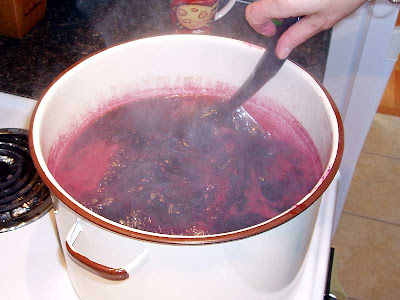
The next step is to dump the grapes into the canning pot, add a little water, mash them and then bring them up to a boil. We had so many grapes that we had to use two pots. The idea here is to break up the grapes and get them to release all their juice. After they have done that the skins and seeds are strained out and you’re left with pure grape juice. It’s a messy process, though. Once the juice is collected the left over mash is thrown on the compost heap.


We ended up with 18 cups of juice so, according to our recipe, we needed 13 ½ cups of sugar. That’s a lot of sugar! We also needed a little less than ½ a cup of lemon juice near the end and that’s all. Another simple recipe! So after boiling, testing and bottling we ended up with 6 500ml and 8 250ml plus some for the fridge. We might have to get another storage shelf for the basement.


5 comments:
You are living my dream. I can't WAIT to move to Japan and be able to do these things!! I savored every picture you posted! What beautiful produce! What fun! Just wonderful!!!!
Wow, you've been busy! I'm having some regular sized tomatoes ripen now. I hope they ripen before the first frost. If not, i'll pull out the plants and hang them upside down inside to let the fruits ripen that way.
I don't have enough to can this year, but your Grandmother Vera's Dutch Salad pickles sound great. Would you post the recipe?
megan
I love mustard pickles and chicken stew or beef stew with Chow Chow... Grape jelly on toast, Oh I'm hungry now!
Pickling can be a lot of fun as well as tasty, thanks for the comments.
For the Sisters of the Blog - I'm working on a new post with the recipe for Mustard Pickles for you. It should be ready soon...
Your jelly looks awesome!! Our grapes are soooo tiny compared to yours! I ended up eating those so no jelly could be made this year, but we should have a much bigger crop in 2011 (as there are transplants that should be producing by then).
I love all the pictures!! Thanks for sharing with us :-)
Post a Comment