
It's DONE!

It started with a couple of drawings and a few photos.

We made a template and installed the footings.

We added landscape cloth and river stones to control the grass and weeds.

We built a platform sturdy enough to constuct a ten story building on.

We added the corner posts to get it up into the air.

Getting the structure of the roof to the top of the posts was a bit of a challenge.

Along the way there were some heavy calculations done along with a lot of head scratching.

The upper roof was added but was quickly deemed to be too small in scale. We lengthened each rafter by a foot or so and came up with a much better diameter.

Eventually, the entire roof structure was completed.

We added some spindles to the upper air vents to provide a little style.

Shingling the roof was a difficult exercise but eventually it got done.

The inside of the roof is a sight to behold. There are a ton of man-hours hidden up there somewhere.

We closed in the two back walls to provide some privacy from the road and we filled the bottom of the other walls with plywood. This is about as far as we got in 2010, the only other thing we did was to cover the privacy walls with cedar shingles.

The first task of the new year was to install the floor. It was so nice to be able to take the chairs inside and sit down that we started using it right away.

Then we added a set of stairs so we didn’t have to crawl in anymore. This was much easier than expected to accomplish.

The window sills and casings were added next.

The trim was all painted and then the walls were covered in tarpaper before the siding was added.

The window screen frames were made and then covered with screen.
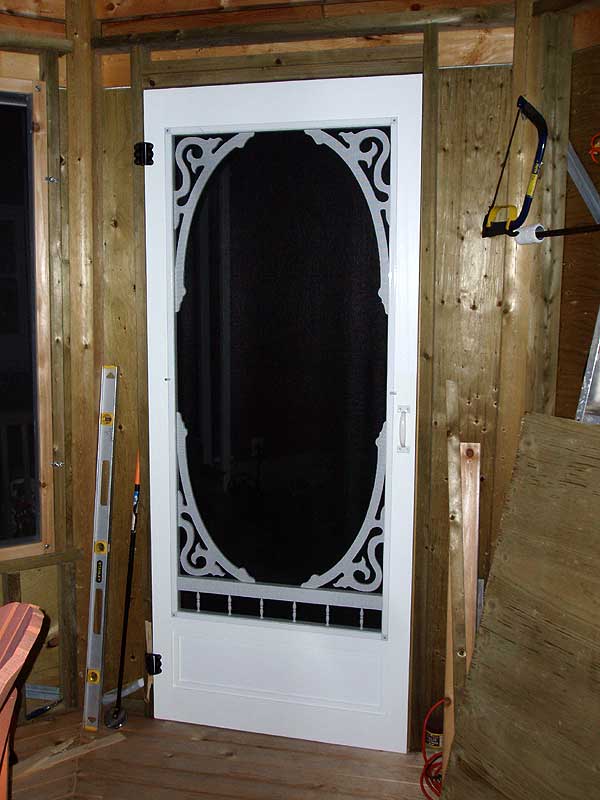
The door was installed next. We bought it on sale last year from the hardware store and painted it in the basement over the winter.

The floor was finished off with a coat of Thompson’s Waterseal.

The last task was to apply the water sealer to all the exterior siding. At some time in the near future we may add some electric power and some lights to the gazebo but for now the building is done.

This project did take up a huge amount of time over two summers. It cost a good chunk of money, too. We think it's worth it though and doesn't it looks pretty back here in the yard?
Just a last note on the budget. We planned to spend about $4000 for our gazebo and we came in just about right on target. In 2010 we spent $3940 and in 2011 it has been another $520 for a total of $4460. Of course, that doesn’t include any labour cost. Thankfully Hubby works for love and beer! Want us to come and build one for you? Not a chance!

12 comments:
Finally! Good things are worth waiting for and your gazebo is gorgeous! What a talented hubby you have and cheap too! What's your next project??
and it's splendid and well worth all your effort. I love it and wish I had one just like it. Only I think I'll have mine made of stone with a flag on top, then I can pretend to be Rapunzel and let down my hair! Only kidding. I love your gazebo. It's gorgeous and the workmanship is A1. What are you going to do in there? or shouldn't I ask!
Blessings
HELLO!!! I'm so glad to read that your beautiful gazebo is done!! You and your husband did an amazing job on it! Each step was carefully thought out and it's truly like a work of art! I know it'll be something that you will enjoy for many years and in all kinds of seasons!!
Thank you for the visit to It Strikes Me Funny and positive comment.
(And yes, that's the first time I've ever said 'thank you' and 'witch' in the same sentence. I hope it's not the last).
Because I'm running low on rescued lumber I am considering the purchase of red cedar for this week's projects in the workshop. More new homes are needed.
However, I'll check out the curbs in the neighbourhood before I head to the lumber store. More news later about that.
I notice the first comment is from my sister, Jane. She is moving to PEI in the next few years. Perhaps your paths will cross.
re the gazebo... wow!! you folks are in the big leagues re wood work. my skill level w birdhouses is growing a gazebo is a long way off.
cheers.
Oh...! It's beautiful! You must be so happy it's finally done! Now you can decorate it for fall :)
Imagine hot coffee on cool autumn mornings...looking out over the scenery...Or cool drinks on hot summer afternoons! I'm sure this will bring you many hours of pleasure and wonderful memories!
The inside of that roof, and the flooring too, are just a masterpiece. (my head is screaming, all those angles!) Well done. That gazebo is going to bring many years of enjoyment.
It is realllllly nice!! Way to go, Witch and Witch's DH :-) Glad you're going to get to enjoy it a bit this fall!
that looks more like princess gazebo
have fun in it....under the moonlight
;)
It's just BEAUTIFUL, Witch!!!
Kudos to you and your DH!
megan
well done it looks lovely and well worth all the hard work...now just pop over to our place and build on.......please!!!!!
Gill
Wow - what a lot of work! It's like building a whole house. But a beautiful result. And your weathervane is the perfect finishing touch. Thanks for sharing all those construction steps. I'll use your post to try to inspire my own hubby to build me something.
I adore this gazebo because it’s just like a mini witch tower that came straight from a story book! If I were you, I would decorate the inside and even turn it into a mini library. Anyway, I can see the hard labor you put into making this possible, and I gotta say that your hubby is a genius. Great job, you guys!
Regards,
Leah Clay
Post a Comment