Thursday, September 16, 2010

Vacation is over, or did it really begin?

Hubby finally got around to finishing up the upper spindles.
It’s not been the best vacation the Witch has ever experienced but it’s certainly not been the worst.

It’s just, well, I made a list, much like a bucket list, and didn’t even come close to fulfilling it. It’s so sad because really I don’t feel I have had a vacation.

Instead I harvested continually, I chopped, sliced, peeled and diced, nonstop. What a stupid idiot really. Are we going to be bunkered down in the basement or some cave? I don’t know what I was thinking and yet I continued to work throughout my holiday. The weather didn’t help either, it’s been raining everyday now for almost two weeks and we did have that whole Hurricane Earl thing to deal with but still. I guess this may be the problem with stay-cations. You tend to stay!! At home there’s always something that needs doing. The garden was ripe and full and what was I to do? Walk away? Not likely as I raised most of it from seed and it felt like 6 months of hard labour. So every day I picked and selected the finest veggies and turned the fruits of my labour into Salsa, Hot Dog Relish, Mustard Pickles and lots of stewed tomatoes and I haven’t even figured out yet what to do with the rest.

Well, it’s just that now I’m tired and need some time to beach-comb and have a nice bottle of dry red wine waiting for me. HUBBY, do you hear me calling? Oh wait, you’ve been up a ladder the last 2 weeks shingling the gazebo roof in rain and hurricane conditions. I’m not complaining (well, maybe a little). It’s just that I’m looking at the end of my holiday coming up really fast and I don’t feel rested up enough to go back (sigh)! And what am I going to do with all the leftover produce from the garden? We’ll probably just end up taking it in to work next week for our co-workers, lucky bastards!

Anyway, here are some pictures of the progress on the gazebo and a few of my first attempt at salsa (it’s yummy!). Oh, and it was pizza night this week and almost all my toppings were from the garden (yummy, too!). I’ll try to be in a better frame of mind for the next post!

The lower roof is just getting started. The drip edge is installed and the first of the rubber membrane is attached.


What! Hubby’s laying down on the job? No, that’s just the angle of the ladder.
What! Hubby’s laying down on the job? No, that’s just the angle of the ladder."
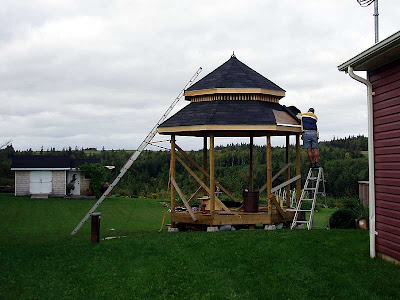
It wasn’t easy trying to nail down the tarpaper in the driving wind and rain!

The salsa ingredients have all been chopped.


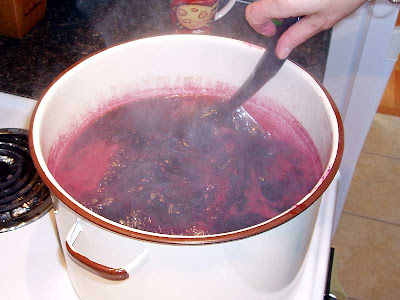
The salsa has been cooked down and now it’s ready to be packed away in containers for the freezer.


These are the peppers I brought in from the garden to top my pizza. There are a selection of Jalapeno and Hungarian Banana peppers, some mild and some hot!
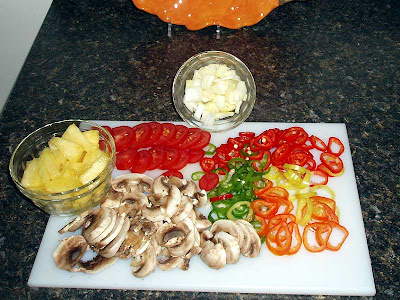


 These are all the toppings for my pizza. Along with the peppers are some of our tomatoes and onions. The pineapple was store-bought.
These are all the toppings for my pizza. Along with the peppers are some of our tomatoes and onions. The pineapple was store-bought.


The finished pizzas were worth the effort!

Sunday, September 12, 2010

Pumpkins Anyone?

Pumpkins for sale, cheap!
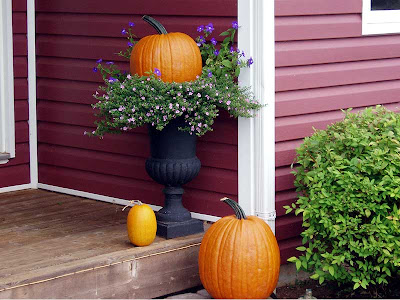
I’m starting to decorate already because we were out driving in the country and look what I spotted. There were lots and lots of pumpkins in every size and colour. Naturally I had to check them all out and give them a though inspection before I chose two (for now). Since that drive I now have 4 pumpkins, they just multiply I tell Hubby.


I couldn’t resist stopping to see this display, and buy pumpkins, too.
While we were driving around we stopped a nursery to see their fall mums and we found these goats and their climbing tower. They were more interested in eating their hay than climbing up to see the sights, though. Anyway, I thought you might enjoy some pictures of our little day trip and where I have placed my pumpkins.


Goat’s eyes are just weird.

The nursery built this climbing tower to keep their goats entertained. You used to be able to winch some feed pellets up to the top which would encourage the goats to climb up but it seems to be gone now.

When pumpkin season starts the flowers just get shoved aside!
I’m sure there will be lots more to come in future posts because Fall (it starts Sept 23) is my favorite time of the year and on that’s the day I start to decorate the inside of our house. Traditions are hard to break on Witch’s Island.


The front flower barrel gets a pumpkin, too.

Friday, September 10, 2010

Vera's Mustard Pickle Recipe for the Sisters


The Sisters of the Blog asked in a comment this week if we would offer up the recipe for Granny's Mustard Pickles and here it is. The picture above is of the actual note she wrote all those years ago. Granny is 94 years old now and this is her mother's recipe so you could say that it is time-tested!

I was really glad to have been watching her make the pickles that day because her measurements were a little off. She would chop the vegetables and pile them to the very top of her 4 cup measure and call it a quart. It was really more like 5 cups or a bit more. My cousin's wife tried making them with the amount listed and her pickles were way too runny.

I've tranlated the note for you below (my comments are in bold).

Dutch Salad Pickles (Mom’s)

Chop fine;

1 qt. green tomatoes
1 qt. green cucumbers
1 qt. onions
1 small cabbage
1 small cauliflower
2 red peppers
2 green peppers
note: 1 qt. = 5 cups for this measure

Put all vegetables into a large plastic tub.
Add ½ cup salt (coarse), cover with cold water and leave overnight.

In the morning, drain well. (This is the secret)

Add (make) dressing.

In a large canning pot mix:
10 tsp Keen’s dry mustard
1 cup flour
6 cups white sugar
½ ounce tumeric

Mix with a little cold vinegar and add 1½ qts.(6 cups) of vinegar.
Bring to a boil (gradually) and pour on pickles (add the vegetables to the hot dressing) and boil 20 minutes (bring back to the boil and then time 20 minutes). (I use some of the 1½ qts vinegar to mix the flour, sugar, mustard and tumeric. I find that it is too thin after the pickles cook if I add more vinegar to mix.) And you can cook them less, it won’t hurt, you have to be careful that it doesn’t stick to the pot and burn (stir constantly!).

Makes about 6 to 6 1/2 litres.


If you make these please tell everybody that they are "Vera's Mustard Pickles". She would be very glad to know you did.

Tuesday, September 7, 2010

Canning Season Has Commenced!

The garden has done very well this year. Lots of produce and nice and early, too.
Don’t you just love this time of year, when all the hard work that you have put into your garden is starting to pay off? I know that I do and I try to take as much advantage as I can of all the beautiful produce out in the backyard. It has been a really productive growing season mostly because of the long sunny summer and early spring. We’ve never had better results from our carrots and beets, they are HUGE. One of each and a piece of steak or chicken is enough for a meal for the two of us. The yellow beans came thick and fast and are just now getting too old. And the tomatoes, oh, the tomatoes! We’ve had cherry tomatoes but the tub full and the lucky people at work have been enjoying the extras again this year. I’m also more than happy with the beefsteaks. Some of them have grown huge, almost the size of grapefruits and they are actually ripening on the vine. That’s a bit unusual for us; the bigger tomatoes usually just stay green or rot before ripening. Last year we actually had to buy some red ones from the grocery store to make Hot Dog Relish.

Last weekend we decided that it was time to make a batch of my Grandmother Vera’s Dutch Salad pickles. These have been a long time favourite in my family and ever since she became unable to make them I have been doing them for myself from the recipe she wrote out for me. I still have the note she gave me and it is part of the fun of doing them to look at it and remember watching her make them for the first time.

Time to break out the Keen’s because it’s Mustard Pickle Time!
Mustard pickles, because that’s a much more descriptive name for them than Dutch Salad, are pretty easy to make but they are time-consuming. The chopping and the brining take at least a couple of hours the first day and then the draining and boiling and bottling take another couple of hours the second day.

The veggies have all been chopped and steeped in the brine over night and now they are draining off the next day.
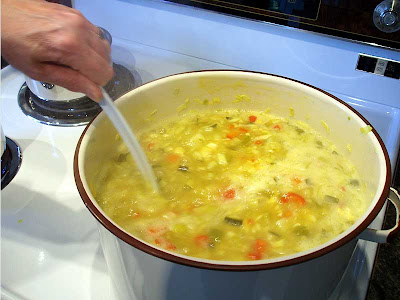
The tedious part is the constant stirring once we start bringing the pot up to a boil. It can take a long time to get there and then it has to be held there for 20 minutes. You really don’t want them to stick and burn on the bottom of the pot though so continuous stirring is required.

The sauce is mixed and now the delicate part of bringing it up to a boil without burning it begins.
The sauce has boiled and the veggies have been added.
It takes a long time to bring the mixture back to a boil.
Once it’s boiling hard again it still has to cook for 20 minutes.


Finally, another year’s worth of Mustard Pickles is ready for eating!
This year’s batch made 8 500ml and 9 250ml jars which is more than enough for me, Hubby has never cared for them for some reason. Mustard pickles go with just about any kind of meal so I eat them regularly but still with that many jars there might even be enough to share.

After I finished making the Mustard pickles I still had time and the inclination to do something else so I decided that I would make a batch of Chow Chow. This is something else that Granny used to make but unfortunately I never got a copy of that recipe and I’ve been trying to duplicate it for the past few years. I’ve tried a bunch of other people’s recipes but they haven’t been quite right. Last year though I found one that was pretty close. It was too salty and not spicy enough but that’s easily fixed.

The Chow recipe is pretty simple.
Chow Chow is pretty simple, mainly just tomatoes, onions, vinegar, salt and a spice bag which gets removed before the relish is bottled. Both this recipe and the Mustard pickles use green tomatoes which we have a ton of this year. We also have lots of onions. It is so much more satisfying to preserve your harvest if you don’t need to go to the grocery store to buy any extras.

The chow mixture is a pretty colour at this stage.
The vegetables have all been chopped and are soaking in the brine. It’s a beautiful colour at this point don’t you think? Looks almost good enough to eat… This year we only got 4 250ml and 1 500ml jars plus a part jar for the fridge. I usually only eat this with fish so that’s more than enough.

This recipe doesn’t make very many jars but this is more than enough for me.
Well, that was last weekend. This week we decided to make our grape jelly mainly because the birds and the remnants of Hurricane Earl were clearing the vines already. We still managed to harvest almost twice as many grapes as last year even though we left some unripened ones on the vine. The birds can have those.

The grape harvest was great this year.
This variety of grape, which we think is Bath, never sweetens up enough to eat. They’re just too tart to enjoy but it makes great jelly. They look really nice, too. We took in some that were still a little green but that didn’t seem to make any difference to the process.

A nicely ripened bunch of Bath grapes we stole from the birds.
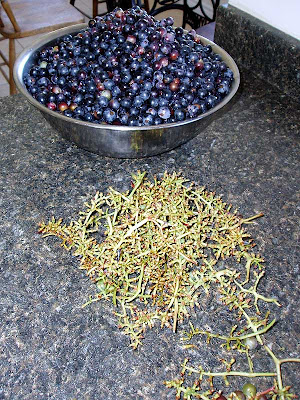
The first step was washing the grapes in a sink full of water to remove any dirt and bugs. Spiders, too, yuck! Then the tiresome job of removing the fruit from the stems began. With the two of working at this it still took over an hour to finish but we ended up with a big pot full of fruit.


There were a lot of stems.
That’s a lot of grapes.
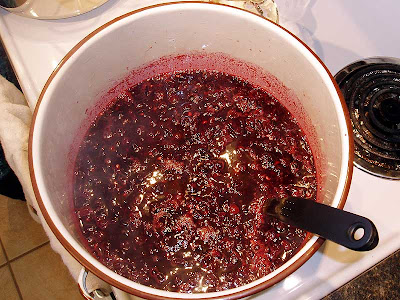
The next step is to dump the grapes into the canning pot, add a little water, mash them and then bring them up to a boil. We had so many grapes that we had to use two pots. The idea here is to break up the grapes and get them to release all their juice. After they have done that the skins and seeds are strained out and you’re left with pure grape juice. It’s a messy process, though. Once the juice is collected the left over mash is thrown on the compost heap.


We use a potato masher to encourage the grapes to split.
Here we are cooking the grapes to release the juice.
Instead of cheesecloth we use a colander to strain out the skins and seeds.
Grape jelly production is a messy business!
This is what we want, pure grape juice.
We ended up with 18 cups of juice so, according to our recipe, we needed 13 ½ cups of sugar. That’s a lot of sugar! We also needed a little less than ½ a cup of lemon juice near the end and that’s all. Another simple recipe! So after boiling, testing and bottling we ended up with 6 500ml and 8 250ml plus some for the fridge. We might have to get another storage shelf for the basement.


We boiled it again until it reached the jelly stage.
My KitchenAid is watching and waiting for its turn on stage!
We’re going to be eating a lot of grape jelly this year.