Sunday, October 31, 2010

Happy Halloween, Everybody!

A big orange snake is coming at you from the alyssum bed!

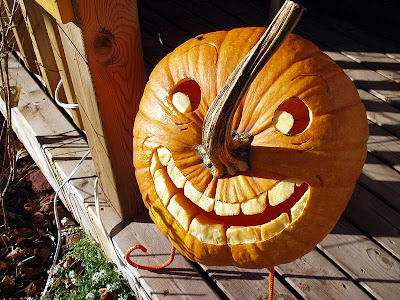
This guy is always putting his nose into other pumpkin’s business.

If you really want to know how to carve a Halloween pumpkin you should just ask Ray Villafane. So Ithought rather than post a long drawn out saga of pumpkin carving this year I would just post some pictures of our pumpkins from a couple of years ago. I hope you get some inspiration to create your own.

Talking about inspiration, a friend sent me this message in an email and I thought it was cute so I’m sharing.
In case you didn't know...


Women are Angels


Women are angels


And when someone breaks our wings....
We simply continue to fly....


On a broomstick....


witch

We're flexible like that..


Here are a few more of our previous pumkins...


Spooky house pumpkin

laughing pumkin

Frankenstein pumpkin
In case you missed the link, here is a gallery of Villafane’s work.

Happy Halloween, all!

Sunday, October 17, 2010

Cost of Building a Gazebo

The gazebo is just about ready for the siding.
The gazebo is just about ready for siding.

As the building season winds down, we are starting to look at how must the gazebo has cost so far. You may remember that we had budgeted about $4000.00 for this project based mostly on hopes and wishes (and the amount we had saved). Well, okay, we did have a little experience with the potting shed project so we knew at least which materials we would need to buy if not how much of each. The shed was a very expensive project though, coming in at around $7000.00 if I remember correctly, and it was a lot less wasteful of materials than the gazebo has been. There are lots of big triangular plywood offcuts lying around that just couldn’t be used in the roof of the new building just as an example. Even with that and with Hubby over-engineering just about every aspect of the project like he’s building a skyscraper we have somehow managed to spend less than the budget.

Here’s a rundown on what’s been spent so far…


ItemNumberCost EachGSTPSTTotal
H Clips 1/2 inch50$2.50$0.13$0.26$2.89
Bevel Square1$7.99$0.40$0.84$9.23
Bolt Lag 5/16 X 616$12.64$0.63$1.33$14.60
Construction Adhesive2$9.98$0.50$1.05$11.53
Corners screen frame pkg.1$3.30$0.17$0.35$3.81
Deck Block9$53.91$2.70$5.66$62.27
Deck Boards cedar 5/4 X 4 X 128$48.16$2.41$5.06$55.62
Deck Boards cedar 5/4 X 4 X 860$193.80$9.69$20.35$223.84
Deck screws 2.5 inch pounds10$52.90$2.65$5.55$61.10
Deck screws 3.0 inch pounds5$26.45$1.32$2.78$30.55
Deck screws 3.5 inch pounds8$40.74$2.04$4.28$47.05
Deck screws 2 in pounds2$10.58$0.53$1.11$12.22
Drip Edge9$78.03$3.90$8.19$90.12
End Cut Preservative1$8.99$0.45$0.94$10.38
Fibreglass screen 48X100' roll1$108.35$5.42$11.38$125.14
Frame screen 4 ft pc4$25.32$1.27$2.66$29.24
Gripgard ice dam roll1$64.00$3.20$6.72$73.92
Hanger Nails Box1$20.69$1.03$2.17$23.90
Hinge pair1$6.87$0.34$0.72$7.93
Joist Hangers 2 X 10 20$32.00$1.60$3.36$36.96
Landscape Cloth1$8.99$0.45$0.94$10.38
Leather Tool Belt1$15.98$0.80$1.68$18.46
Nails 1 1/4 Aluminum White1$7.49$0.37$0.79$8.65
Nails 1 in Roofing lbs.5$11.45$0.57$1.20$13.22
Nails 2.5 in Spiral box2$11.98$0.60$1.26$13.84
Nails Finishing Galv. 1.5 in box1$5.99$0.30$0.63$6.92
Nails Roofing 1 in. box1$14.69$0.73$1.54$16.97
Paint Behr Ultra white1$45.97$2.30$4.83$53.10
Patio Stone 18 X 18 10$59.90$3.00$6.29$69.18
Pine 1 X 4 X 8 clear8$50.56$2.53$5.31$58.40
Pine 1 X 6 X 6 clear8$95.36$4.77$10.01$110.14
Pine 1 X 6 X 8 clear5$71.74$3.59$7.53$82.86
Plywood 1/2 in Select Spruce PT6$215.82$10.79$22.66$249.27
Plywood 1/2 in Std Spruce11$237.17$11.86$24.90$273.93
Plywood Meranti 1/4 in3$47.37$2.37$4.97$54.71
Post Base 4 X 4 galvanized8$35.92$1.80$3.77$41.49
River Stones 20 kg. Bags30$134.70$6.74$14.14$155.58
Sandpaper 100 grit disk2$1.38$0.07$0.14$1.59
Sandpaper 60 grit disk2$1.38$0.07$0.14$1.59
Screen Door1$135.20$6.76$14.20$156.16
Scrub Brush1$10.49$0.52$1.10$12.12
Shingles Black Bundles9$209.67$10.48$22.02$242.17
Shingles Cedar bundles2$42.00$2.10$4.41$48.51
Skewable Hangers6$13.74$0.69$1.44$15.87
Spline screen roll1$4.95$0.25$0.52$5.72
Spout paint can1$1.58$0.08$0.17$1.82
Spruce 2 X 10 X 10 PT2$33.94$1.70$3.56$39.20
Spruce 2 X 10 X 12 PT7$136.22$6.81$14.30$157.33
Spruce 2 X 10 X 8 PT10$131.72$6.59$13.83$152.14
Spruce 2 X 4 X 1018$54.80$2.74$5.75$63.29
Spruce 2 X 4 X 10 PT10$42.80$2.14$4.49$49.43
Spruce 2 X 4 X 1220$76.80$3.84$8.06$88.70
Spruce 2 X 4 X 826$86.22$4.31$9.05$99.58
Spruce 2 X 4 X 8 PT22$83.38$4.17$8.75$96.30
Spruce 2 X 6 X 106$30.00$1.50$3.15$34.65
Spruce 2 X 6 X 126$36.00$1.80$3.78$41.58
Spruce 2 X 6 X 812$43.20$2.16$4.54$49.90
Spruce 4 X 4 X 8 PT10$88.88$4.44$9.33$102.66
Tarpaper Roll1$24.99$1.25$2.62$28.86
Thompson Water Seal large1$44.99$2.25$4.72$51.96
Thompson Water Seal regular1$22.99$1.15$2.41$26.55
Washer Flat 5/16 Zinc16$0.80$0.04$0.08$0.92
Weathervane1$86.45$4.32$9.08$99.85
Wind Brace 11 ft.4$23.96$1.20$2.52$27.67
Work Gloves2$4.00$0.20$0.42$4.62
Grand Total512$3,350.81$167.54$351.84$3,870.19


Obviously, the building is not yet complete so that $3,870.19 figure is going to go up but it won’t be by much. We have a lot of supplies already purchased that are just waiting to be used. We have the rest of the framing for the door and windows; we have the door, flooring, screening and some of the shingles. In fact, about all we have yet to buy is the remainder of the cedar shingles and the metal framing for the screens. We might just be able to buy that for less than $129.81 you never know!

Sunday, October 10, 2010

Happy Thanksgiving, Everyone!

 Happy Thanksgiving, Everyone!
Happy Thanksgiving, Everyone!

I love Thanksgiving weekend! Especially this year as I was able to convince the boss at work to give me an extra two days (Thursday and Friday) off. Five day weekends sure beats five day workweeks! I used both extra days just for me (at least as much as I could convince myself to do so). On Thursday I slept in as long as possible and then had a nice relaxing day around the house. On Friday I took myself to the Big City for a fun day of shopping at the Boutique (Value Village) and elsewhere.

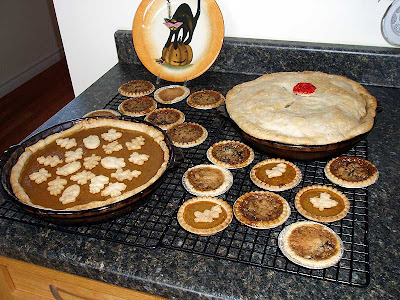
Saturday morning I was all rested up and raring to go. Hubby and I made a quick trip to the Small City to visit the Farmer’s Market and do some grocery shopping. Hubby needed some more (!!) plywood for the gazebo so we picked that up, too. When we got home he went off to build and, with him out from underfoot, I settled down to some serious baking time. I made all my fall favourites; pumpkin pie, apple pie and butter tarts! The apple pie was made with Honey Crisp apples that we picked last weekend at a local orchard. They make a surprisingly tart filling and I’ll definitely be using them again. I made all the pastry a couple of weekends ago and then froze it to ease the workload this weekend. That saved me a lot of time. My KitchenAid was a great help, too. This is the first year ever where the pumpkin pie filling didn’t get sprayed all over the walls by the hand mixer!All told I made 1 deep-dish apple pie, 1 pumpkin pie with pastry decorations, 3 pumpkin tarts and a dozen butter tarts. Not bad for a few hours on a Saturday afternoon!

 We picked these Honey Crisp apples at a local orchard last week. This will be the first time I’ve tried them in a pie.
We picked these Honey Crisp apples at a local orchard last week. This will be the first time I’ve tried them in a pie.


 I sure am glad that I made and froze this pastry dough last month.
I sure am glad that I made and froze this pastry dough last month.


 This pastry mat is the perfect  device for rolling out dough to the right shape.
This pastry mat is the perfect device for rolling out dough to the right shape.


 The dough is rolled out and is ready for the pie pan.
The dough is rolled out and is ready for the pie pan.


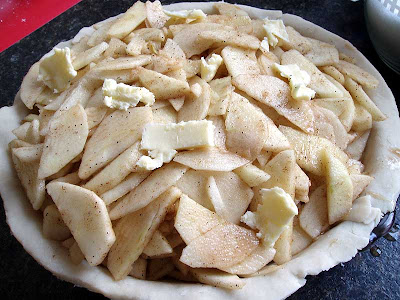
 The apples have all been sliced, spiced and added to the shell.
The apples have all been sliced, spiced and added to the shell.


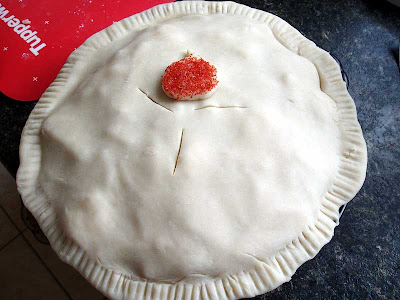
 My pie is ready for the oven.
My pie is ready for the oven.


 I used  a set of fall-themed cookie cutters to make these decorations from the left-over pastry.
I used a set of fall-themed cookie cutters to make these decorations from the left-over pastry.


 The pumpkin pie filling was mixed in my new KitchenAid!
The pumpkin pie filling was mixed in my new KitchenAid!


 The KitchenAid did a great job. No splattering of filling on the walls!
The KitchenAid did a great job. No splattering of filling on the walls!


 Butter Tarts were next.
Butter Tarts were next.


 The KitchenAid was great at this, too.
The KitchenAid was great at this, too.


 I wish I had a shop window to display all my lovely baked goods!
I wish I had a shop window to display all my lovely baked goods!


After all the baking was done we finally had a chance to break out the Halloween decorations. I have 3 great big plastic tubs full of Halloween-themed stuff and I still manage to acquire more every year somehow. It’s gotten to the point now where I have to pick out just my favourite items to put on display and I end up leaving the rest of it in the tubs. Some of my things haven’t been out for years. Maybe one day I’ll have a yard sale and everything on sale will have something to do with Halloween. Man, would I ever love to come upon a sale like that!

Here are a few of my best pieces. I hope you like them.

 This witch welcomes everybody who comes to the front door.
This witch welcomes everybody who comes to the front door.


 We made this happy pumpkin family years ago.
We made this happy pumpkin family years ago.


 Pumpkin-Creep
I found this guy at Winners a few years ago. He’s kind of a cross between W. C. Fields and Humpty Dumpty. He was so creepy I just had to buy him.


 Winners pumpkin.
This big ceramic pumpkin was another Winners find.


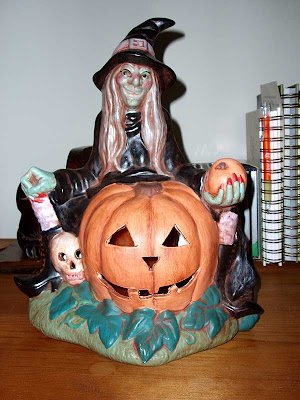
 Reggie’s Witch light.
My Dad bought this for me at a yard sale because he knew I would treasure it.


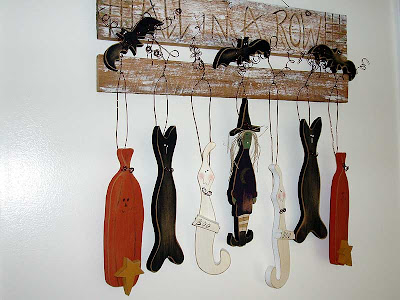
 All-In-A-Row Halloween set.
I saw this craft on the ‘net years ago and I just had to make one for myself. This is my favourite set of hangers but I have 3 others, too. One for Easter, one for summer and a birdhouse set.


Haunted castle craft.
This is one of Hubby’s efforts. He found the pattern in a book he bought.


Skelleton stained glass hand.
I took a stained glass class twenty years ago and this skeleton hand is one of my favourite efforts in that discipline.


Three headed witch craft.
The saying goes “Two heads are better than one.” but it seems that three heads just leads to confusion!


Halloween message.
Here’s a little Halloween wish for you.


 Ratty says that he just wants to give you a little kiss!
Ratty says that he just wants to give you a little kiss good-bye!

Saturday, October 2, 2010

My Gazebo May be A Two-Year Project!

 The gazebo is finally getting some work on the lower parts.
The gazebo is finally getting some work on the lower parts.

Finding time to work on the gazebo has been tough for the last month or so. When we started this project we thought that it would be more or less done during Hubby’s vacation (his main vacation that is, as opposed to the one he had last month) but it turned out to be a much more complicated build than he was prepared for. The upper roof took forever requiring almost full extension of the big ladder and even then he was stretched out as far as possible to reach the peak. The lower roof was a little easier but it still required multiple positions of the ladder, each one needing various shims to make it vertical. Then there were fascia boards and caulking and sanding… Needless to say, his desire to get the upper sections done is getting pretty intense. They are now ready for the paint that we bought a month ago if only the weather holds on long enough to get it done. Other than that the only thing left to do up on top is to attach my new weathervane.

The fascia boards have all been sealed and sanded are now ready to be painted.

Wait a sec; I don’t think I mentioned that before. We’ve had this really heavy mounting system for a weathervane ever since we built the potting shed but for some reason we just never got around to buying a weathervane to put in it. I guess that explains why we didn’t put the mount up on the shed, either. Now that the gazebo roof is (almost) finished it’s practically crying out for some kind of finial to cap it off. I remembered that when we were in Mahone Bay a couple of years ago there was this really nice nature store that sold weathervanes so I looked them up to see if they were available online.

The store is called “For The Birds Nature Shop” and they have tons of weathervanes to choose from but it was a pretty easy selection for me. Well, besides the “Flying Witch on Broomstick” they also have “Moon and Bats” but I’m not sure that the bats would stay attached. Anyway, the Witch is just so appropriate that how could I pick anything else? It was back-ordered when I called but it has been shipped to me now and should be here today or Monday. The only question now is whether it will be the right scale for the gazebo. If we put it up and it looks too small we will put on the shed roof and look for something bigger for the gazebo.

My new weathervane as shown on the For The Birds Nature Shop website
My new weathervane as shown on the For The Birds Nature Shop website.

Yesterday Hubby finally started to work on the lower part. Two of the facets towards the road are going to be solid and covered with cedar shingles from top to bottom for privacy and heat control. He framed those walls in and they’re now ready for some plywood and the shingles. The doorway will be framed out next and then the other 5 facets will get some shingles on their lower 3 feet and then the screening. Maybe someday we will actually put some flooring down, too. It would at least be nice to get the wood off the house deck!

The upper spindles and their trim pieces are all finished.

The two privacy walls have been framed out.

The inside of the roof, someday I may get to sit under it.

As we’re now into October I guess that some of this work is just going to have to wait until next spring. Hopefully I’ll get to use it sometime next summer and that it does its job to keep the flies and mosquitoes under control.

UPDATE!!

My weathervane arrived in great shape and exactly when I was expecting it. The For The Birds store is a great place to shop. I loved dealing with them! Doesn't She look beautiful up there
My weathervane arrived in great shape and exactly when I was expecting it. The For The Birds store is a great place to shop. I loved dealing with them! Doesn't She look beautiful up there?!